How to Measure
Accurate measurements are the foundation of custom-fit window treatments. Use our technical guides to determine the correct dimensions for your hardware and space.
Select Product Category
Different window treatments require specific measurement logic. Choose the guide that matches your project requirements.

Curtains & Drapes
The 'Point-to-Point' measurement method: provide dimensions from the top of your hardware to your desired endpoint. Fullness is calculated at the workroom level.
- Top-of-hardware height logic
- Calculated 2x+ fullness
- Single panel ordering logic

Woven & Roman Shades
The 'Opening-First' method: provide the raw window dimensions. All necessary factory deductions for inside mounts are handled during production.
- Inside vs Outside mount standards
- Factory deduction protocols
- Mounting depth requirements
Drapery Measurement Guide
Technical steps for determining finished width and height.
Open curtain calculatorDetermine Coverage Width
Measure the full width of your rod or track. If hardware is not yet installed, measure the window and add 4-8" per side for optimal coverage. You can add even more allowance if you want to create the effect of a wider window. Drapes are sold as Single Panels; for a pair, divide the total width by two.
Design Note: Extended width allows panels to stack off-glass when open, maximizing natural light and creating a grander architectural feel.
Measure Finished Height
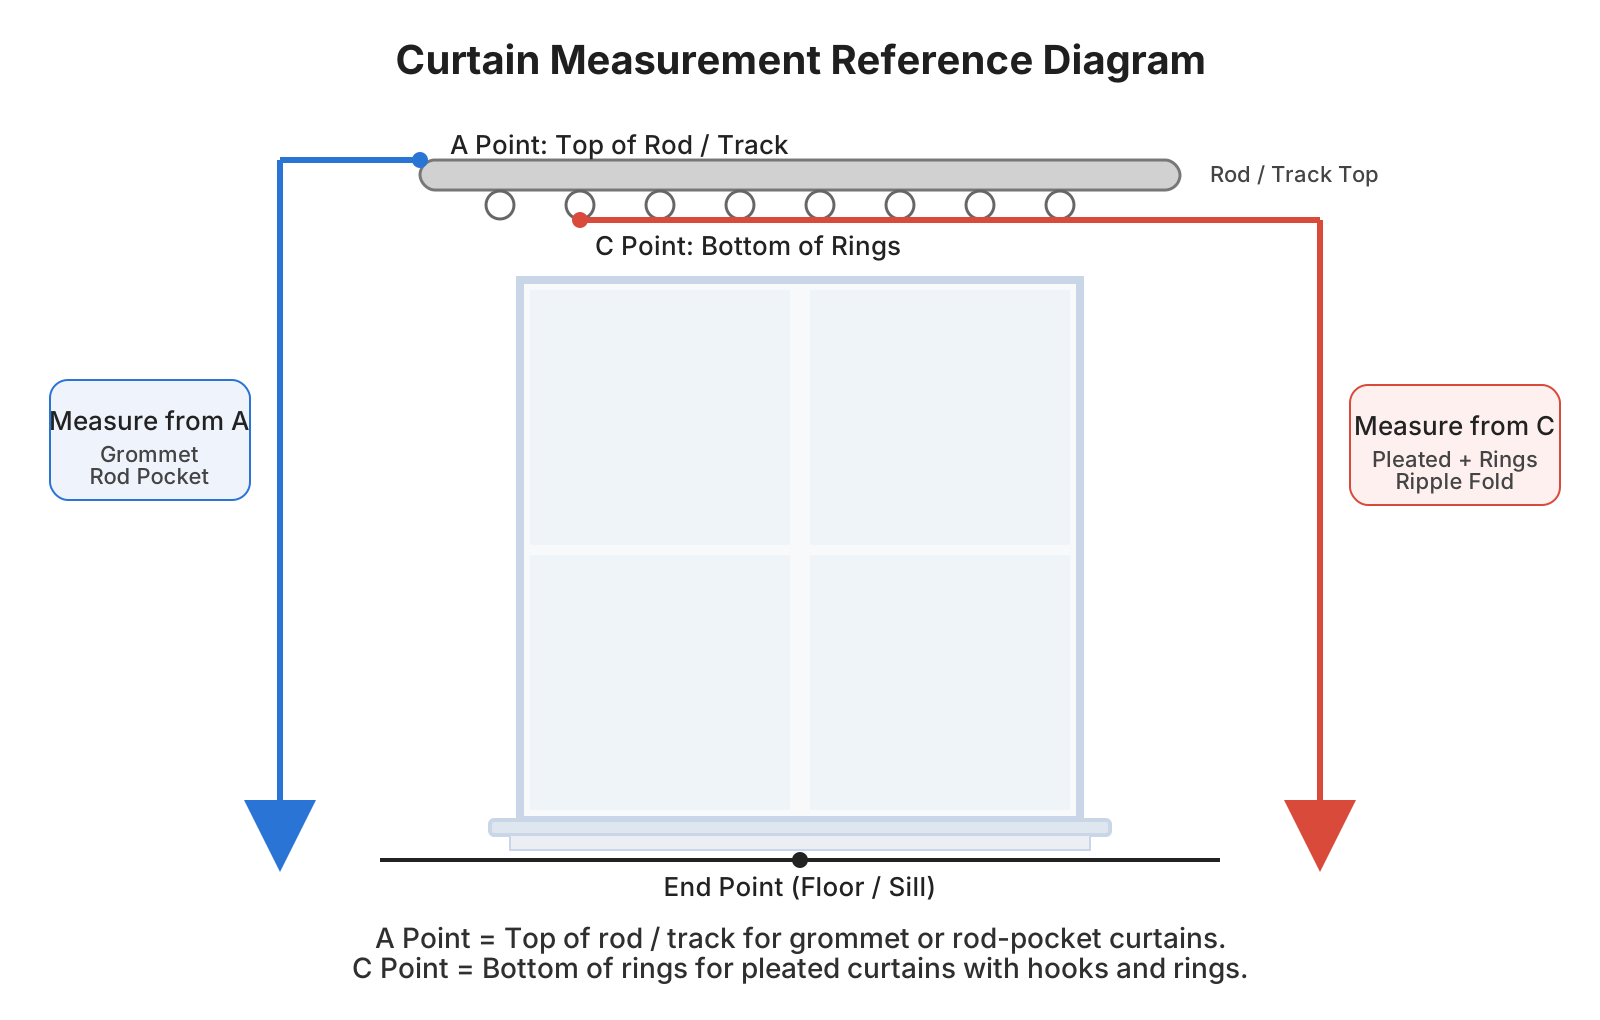
The measurement starting point depends on your header style. See the diagram below for a visual guide.
Route A — Measure from top of rod or track
Fabric mounts directly on or through the rod. Start at the highest point of the hardware and measure down to your desired endpoint. No deductions needed.
Grommet · Rod Pocket · Tab Top · Back Tab
Route C — Measure from bottom of rings or hooks
Rod installed: measure directly from the bottom of the ring — no deduction. If rod is not yet installed, estimate the rod position and deduct 2" for the ring drop.
Pinch Pleat · Triple Pleat · Tailor Pleat · Goblet Pleat · Pencil Pleat · Ripple Fold
Select Floor Clearance
Determine the final measurement based on your preferred aesthetic relationship with the floor:
Order Specifications
Enter the width for one individual panel. The workroom automatically applies the appropriate fullness (typically 2.0x to 2.2x) to the width provided.
- Order unit: Single Panel
- Width per piece: Required
- Fullness: Factory engineered
- Quantity: Set at checkout
- Measure in whole inches. Add a note at checkout for fractional precision.
Measurement Reference Diagram
Shades Measurement Guide
Provide your exact window opening dimensions. We handle the deductions.
Open illustrated shade calculatorChoosing Your Mount

- Minimalist, integrated look
- Highlights window trim
- Automated factory deductions
- Requires specific frame depth

- Maximum light control
- Makes windows appear larger
- Covers unattractive trim
- No depth requirements
Check Mounting Depth
Measure the flat mounting depth at the top of the opening. Standard Roman Shades require more than 3", standard Woven Wood Shades require more than 2", and French Door shades require at least 1.5".
Requirement: If a standard inside mount does not fit but at least 1.5" is available, consider the matching French Door collection. Otherwise choose Outside Mount.
Measure Width (Inside vs Outside)
Inside Mount: Measure the opening at the top, middle, and bottom. Record the narrowest width. Enter the exact window-opening width—this is not the finished headrail width. LuxDrape takes the factory deduction for installation clearance.
Outside Mount: Measure the total area to be covered. We recommend adding 2" to each side (4" total) for optimal light blockage.
Measure Height (Inside vs Outside)
Inside Mount: Measure at the left, center, and right. Record the longest height. Round up to the nearest 1/8".
Outside Mount: Measure the full area from the top of the headrail to your desired bottom endpoint. No deductions will be taken.
Visual Consistency
If ordering multiple shades for the same room, use the largest height measurement across all windows to ensure identical pleat alignment.
Professional Standards
Key considerations for ensuring technical accuracy in your custom order.
Panel Quantity Logic
Drapes are crafted as single units. If you require a pair to cover a single rod, ensure the width entered is half of the total coverage and the quantity is set to two.
Measurement Tools
Always use a professional steel tape measure. Fabric or plastic tapes can stretch, leading to inaccurate results at the 1/8" level.
Hardware Starting Point
Height measurements depend on header style. Grommet and rod pocket styles measure from top of rod. Pleated styles with rings measure from bottom of rings.
Manual Deduction Errors
For inside-mount shades, do not subtract any width yourself. Providing pre-deducted measurements may cause gaps that exceed our light-control standards.
Want us to review the room?
Send your window photos, goals, and any measurements you already have. A specialist normally replies within 1–2 business days.
Submit for reviewThis is an asynchronous review, not a live video appointment.